

How To Draw A New Building On A Site Plan
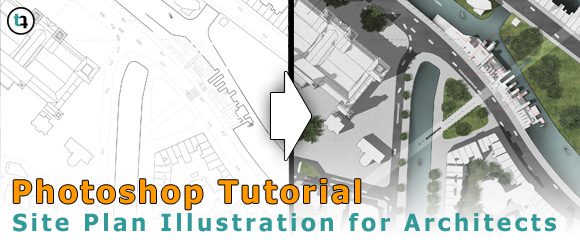
In this tutorial Julien will breakup her workflow how to make a site plan rendering or master plan illustration in Photoshop based on an imported cad drawing. She volition show how to smartly apply textures in a way that is dynamic, realistic and nigh importantly improve the workflow speed! In other words: She will endeavor to get a overnice result with reasonable attempt – enjoy information technology!
About my site plan compages/urban design projection
I will apply an older academy project of a sound gallery intended to plug into the existing cultural arts precinct of the city. The definition of the term art appears to be expanding then this project was nigh treating sound as a class of art itself. As a main plan the idea was to establish every bit stiff a relation with its existing urban and natural fabric.
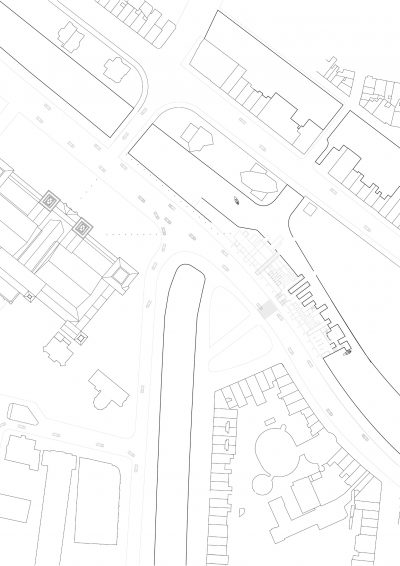
Import the architectural site programme line work
Similar any architectural visualization project in Photoshop it will start with the bones second line piece of work. In my case I used AutoCAD to draw the context program.
Earlier I introduce whatsoever kind of depth or color into the image I suit this layer first and so that it reads clearly as a line work image. In this example, because of the nature of the site, information technology was of import to identify the h2o canals surrounding the area, so the lines in these areas are much bolder.
Modifying the line work can be done in a number of ways, I prefer to do it already inside the original CAD software (in this instance in AutoCAD). Every at present and then I sometimes import the PDF into Adobe Illustrator every bit the transition betwixt Photoshop and Illustrator is seamless and can sometimes speed up workflow if it is just a few areas that need to exist cleaned up.
Adding shadows to the buildings in the context plan in Photoshop
The next step is integrating building shadows. This is a regularly debated topic in floor plan visualization as building shadows can quickly brand an image far too decorated, and as a result misfile the purpose of a floor programme. Floor plans generally talk about space/programme/function, non calorie-free. I think when it comes to contextual urban plans all the same, they provide a huge influence on how the paradigm is read and really assist to understand calibration particularly to those who aren't familiar with the project. So shadows can merely ship additional information to empathize the pattern in full general.
In this example for example, the biggest shadow is coming from the adjacent 'castle' looking building. To create the shadows I quickly create the 3d buildings in SketchUp. The below image shows the isolated shadow image being exported straight out of SketchUp.

Now the work in Photoshop starts, where I combine the line work with the shadows. The below images show the line piece of work overlayed on top of the shadow layer:
I "merge" both elements only by ordering the layers correctly or setting the blend manner of the shadow layer to multiply. Already from this, the image suddenly has a lot more depth, simply with this you tin can see how quickly the shadows can become overpowering, therefore I oft will play with the opacity of these until I am happy by changing the transparency of the shadow layer. Occasionally I employ a slight Gaussian mistiness filter to soften the shadows.
Improving Photoshop workflow speed by using 2d color fills
Now that all the bones elements are in identify, it'due south time to have some fun and bring some colour into the image. At this point I utilise elementary 2nd flat colored fills, nothing fancy here and the reason for that is mostly because they're used as masks to begin with. If the base line work layer is done properly and there aren't any openings in the line work and so this step should be pretty directly forward using the magic wand tool to quickly highlight and color in spaces.
The purpose of this step is to set up myself up for quick masking. For anyone who is familiar with 3D rendering and V-Ray software, what I am doing hither is basically setting up my ain Material ID layer, which is used to quickly select parts I tin employ textures to. This is a technique that is frequently just done in 3D rendering, however I take found this has been equally useful in 2D drawings every bit this speeds up the workflow a lot when it comes to adding/editing textures and and so it is really important setting up this layer early on.
So in my instance I too create dissimilar layer with different "Materials". Afterward this step I take dissimilar layer for these areas:
- Grass
- Water
- Sidewalk
- Road
In combination it now already looks like this:

Looks already ok, right – but we will continue to improve the look even more.
Depending on the project, this process tin get a lot more complex depending on the amount of floor finishes y'all want to capture. To practise a quick selection of everything on that layer, hold down 'command' (Alt on PC) and select the thumbnail of that layer. Some people like to consign their original CAD work in the same layer and so that their fills/line work/shadows are combined and exported out as a single JPG/PDF from whatever CAD software they are using therefore skipping the start two steps.
This often depends on the software you use too. This in theory yet works, simply I notice it becomes a ii click process instead of ane click when information technology comes to selecting each material as you accept to select the layer, and and then magic wand the area you demand, equally opposed to but holding 'Control' and selecting the layer. Furthermore, when shadows are already embedded into a coloured image, information technology makes the magic wand a fiddling redundant in terms of speed. Information technology sounds more abrasive to set up in Photoshop – creating individual layers for line work, shadows and 2D colour fills, just it speeds up workflow further down the rails and gives much more flexibility being able to tweak each graphical chemical element in the image
Adding a grass texture to the site plan of my urban design
The next step is to add together textures to each of these areas I already filled similar the h2o, roads, pavements etc.
It is of import to think virtually the scale of the plan you are doing versus the scale of the texture you use. In this image for example, the grass textures I used had to exist scaled downwardly a fair scrap otherwise each blade of grass would be really obvious in the prototype which is not really a good idea for a site programme.
If y'all apply "standard" grass textures which are seamlessly tileable you might have the problem that these textures oft times exercise not embrace large areas, simply rather a few meters. Therefore I sometimes employ satellite imagery of grass fields for these context plans instead of grass textures you discover everywhere every bit they more accurately capture the calibration of the texture.
In improver information technology is not actually important for these kind of textures for urban design that the texture is seamlessly tileable as one photograph often times is enough for i of the elements that you want to cover with the texture. These photos also accept the reward that y'all avert the tile-issue y'all go oft times with tileable textures because you merely do not employ tiles!
So allow'due south import a photograph of a grass field which volition and then look like this:

In this case I simply tile the photo texture in Photoshop until it covers the unabridged canvass as shown below. You tin remove the seams by using the postage tool.

So I filled out the entire canvas with this texture and use the mask from the 2D fill layer we created earlier for the grass. After this, I play with layer blend modes and layer opacity. This process tin involve a scrap of trouble shooting depending on the prototype, but the cardinal layer blending modes to look out for in this procedure will be:
- 'overlay'
- 'multiply'
- occasionally 'lighten'
and even sometimes (as in this case) I leave it on normal and work with the transparency/opacity instead. I like to pay around with a combination of textures so information technology is pretty rare to have a unmarried texture set on 100% opacity. Sometimes I discover that the texture I use only doesn't piece of work with the epitome, however considering of the 2nd fills nosotros setup earlier, it allows usa to swap out the texture fairly rapidly without having to re-cutting out the spaces where the texture is required. It is just merely a thing of re-applying the mask from the 2D fill layer.
Thank you to the layer mask the green grass texture is applied instantly and my urban design visualization now looks like this:

Adding additional textures to the context programme in Photoshop
Next I repeat the steps affair with the roads:

Calculation landscape entourage (cutout trees) in Photoshop
The next step is to start calculation landscape entourage as nosotros want to bring life to our context plan, right! This step is pretty directly forward, it is really only a copy and paste exercise – at first. It is important to have nice and good quality cutout trees here. In addition you want to avoid the clone effect by using 1 tree image for all trees on your cartoon every bit it actually looks not professional…
Avoid the clone issue with special cutout tree architectural entourage
Therefore nosotros use ane of our superlative view cutout trees from our "TopViewTrees Drove" that are made for this kind of architectural visualizations:
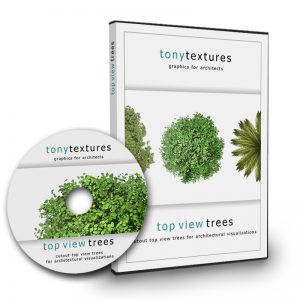
The drove comes with a bunch of graphics for all kind of architectural plans. In general our graphics for top view copse for context plans include 9 variations of the same tree type in one file to avert the clone effect in your site plans. Yous can get one of the files for free here to apply for your tutorial or fifty-fifty for your commercial compages and urban design projects:

This loftier quality graphic of 4.000 x 4.000 px (around 22 MB) is already masked (=transparent background) and thus can be merged with your site plan instantly. The .PNG file is function of the OpenArchiVIZpack – our free and handy graphic library for architectural visualization here:

There y'all will find various other cutouts and textures for your next architectural visualization project that you lot can likewise utilize for complimentary – fifty-fifty for commercial projects!
OK let's import the 9 trees to Adobe Photoshop and yous tin commencement scale them more or less to a proper size that fits to your cartoon. And then I copy and paste each unmarried tree in my Photoshop file. If I copy one of it I likewise rotate and scale it slightly so that the wait even more different.
By doing you lot will avert the clone expect for 100%!

Equally you tin see the tone of the copse are a little confusing with the grass and the overall image tones. This is where color correction is your friend. In this case, I desaturated the trees a little so they contrasted with the other tones of the grass and sidewalk a bit more.

Calculation shadow upshot to the imported cutout trees
Next I duplicate all the copse and add together a blackness color overlay, and drop the layers opacity downwardly to effectually 30%. This layer acts as the tree shadow, I nudge them slightly askew from the trees in the aforementioned direction every bit the other building shadows.

Terminal details: Create h2o shadows
With the bulk of the prototype now complete, it is really only about finessing certain areas. I wanted to bring some depth to the water and illustrate the elevation data of the canals so I painted some shadows (once again the aforementioned direction roughly as the buildings) to illustrate that they sit down below the city ground aeroplane.

I accentuate shadows around main intersections such as the bridge adjusting the opacity and flow of the brush as I go. This is a pretty unproblematic (and fun) action that really brings a whole new level of depth to the image as you tin can tell.
Final Details: Additional grass texture overlay for additional construction
At this point I'm all the same not completely happy with the grass as it all looks a little too perfect for my liking and things in nature are more often than not imperfect. Therefore I want to work with an overlay texture that will be modified and and then merged with the grass texture to give use a slightly different touch to information technology.
OK – lets look for a nice texture that can be used to be merged. Therefore I browse through our 4000+ free texture library where you can grab plenty of costless textures for your project:

As it will exist adjusted quite a bit and simply be applied with transparency information technology does non need to be a grass texture – it is more than important that it has some interesting texture consequence so I simply pick this i:

So I import it and brand following adjustments:
- Calculation Motion Blur Filter
- Modifying Levels
- Desaturate the texture
- Reduce layer opacity to 30-twoscore%
- Layer mode: Soft Light
Utilise aforementioned layer mask as the light-green fill layer. Hither you meet the process:

Even in the small thumbnails you can come across that this gives a little more a roughed out appearance to the grass, right?
Adding a physical overlay texture over the complete context plan
Finally one pocket-sized tip: When I finished nearly everything I as well utilise another texture epitome to the complete layout to add a subtle kind of vintage await to the prototype. In my case I will go for a physical texture that besides gives a nice consequence to the buildings which are more or less white currently.
So once more I grab a overnice texture from our free 4000+ texture library once more:

I utilise the concrete texture just with around 20% opacity and it volition then look like this:

Terminal Details: Adding labels, street names etc.

Lastly, I add together all the diagrammatic data, street names, major building labels and whatever data relevant to the urban design of the project.
This whole process from first to cease can take anywhere up to three-half-dozen hours depending on the complication of the project. My workflow has improved a lot since implementing these simple techniques that this tutorial has covered. In fact, when I kickoff made a comparable image in University I probably spent upwards of about 20 hours only to finish it. As such, Photoshop is more than about working smartly more it is almost doing as much as possible.
Hopefully with this tutorial you will have learnt virtually the significance of textures non but in 3D renders simply how they can be used to convey data in 2nd every bit well. In addition I promise you got inspired by the simple, just appealing look you can create for your next architectural site plan rendering with reasonable effort. Thanks!

Source: https://www.tonytextures.com/how-to-create-an-architecture-site-plan-rendering-in-photoshop/
Posted by: lujancoldingaze.blogspot.com
0 Response to "How To Draw A New Building On A Site Plan"
Post a Comment